Imagine biting into a perfect no-bake dessert that instantly takes you back to childhood. Butterfinger Balls are that magical candy recipe. They combine nostalgia with irresistible flavor. These bite-sized treats capture the essence of the classic Butterfinger candy bar, transformed into a homemade delicacy you can create in your own kitchen.
Craving a quick and delicious no-bake dessert that will impress family and friends? Butterfinger Balls are your answer. With just a few simple ingredients and minimal preparation time, you can whip up a batch of these delectable candy recipes in under 30 minutes. Whether you’re hosting a party or looking for a sweet afternoon treat, these no-bake desserts are guaranteed to satisfy your sugar cravings.
Perfect for both novice and experienced bakers, this Butterfinger Balls recipe requires no special skills. Kids can join in the fun, helping to roll the mixture and decorate the final treats. Get ready to discover a simple yet spectacular dessert that will become a family favorite in no time.
What Makes Butterfinger Balls the Perfect No-Bake Treat
Peanut butter balls are a hit with both kids and adults. They mix flavors and textures in a way that’s hard to resist. Perfect for family events or a quick snack, they’re loved by all.
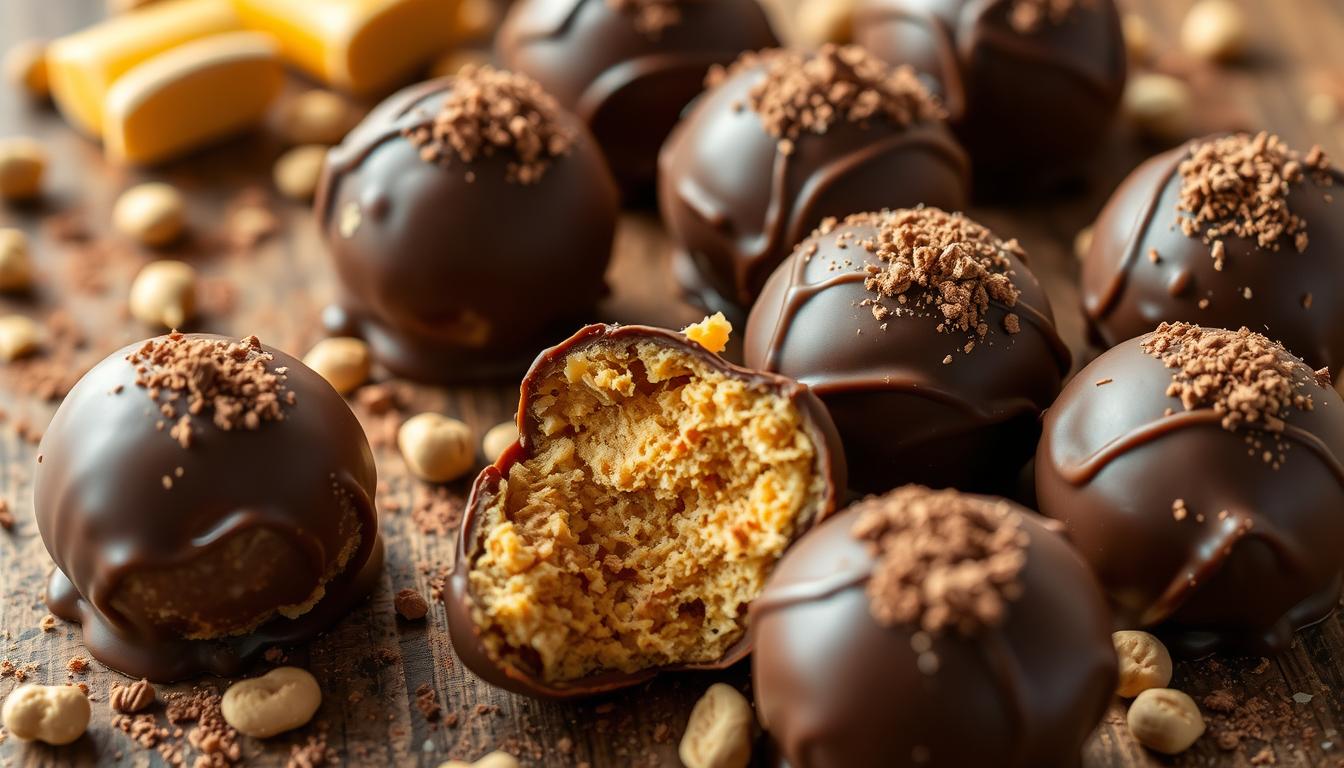
The Irresistible Crunch Factor
Butterfinger balls stand out because of their unique texture. Each bite is a mix of crispy and smooth. The crushed Butterfinger bars add a crunchy surprise that makes them special.
- Crispy Butterfinger pieces provide unexpected texture
- Smooth chocolate coating adds rich flavor
- Satisfying crunch in every bite
Quick Preparation Time Benefits
These snacks are quick to make. With just a few ingredients, you can whip up delicious peanut butter balls in under 30 minutes. No baking means less kitchen time and more fun.
Year-Round Snacking Appeal
Butterfinger balls are great for any time of year. They’re perfect for summer picnics, winter holidays, or a quick snack. You can make them ahead of time, which is great for busy days.

Each ball has 202 calories, with 13g of fat and 4g of protein. They’re small but pack a big flavor punch, making them guilt-free treats.
Essential Kitchen Tools and Equipment

Making tasty treats like Butterfinger Balls is easy with just a few tools. You don’t need expensive gadgets to make these yummy treats that kids will enjoy making and eating!
Here’s a list of must-have tools you’ll need:
- Large mixing bowl for combining ingredients
- Wooden spoon or silicone spatula for stirring
- Microwave-safe bowl for melting chocolate
- Wax paper or parchment paper for easy cleanup
- Baking sheets for setting your candies
- Cooling rack to help treats set quickly
Tools that can make things easier include:
- Electric mixer for smooth mixing
- Small cookie scoop for uniform sizing
- Melon baller for creating perfect bite-sized treats
- Tablespoon measure for consistent portioning
Getting kids involved in making these treats is fun and safe. With basic tools and adult help, kids can measure, mix, and even dip the Butterfinger Balls in chocolate.
The beauty of these desserts is how simple they are. Most people already have these tools at home. This makes the recipe easy and fun for everyone.
Main Ingredients and Substitutions Guide
Making tasty chocolate-coated treats needs the right ingredients. Your Butterfinger Balls will be amazing with the right mix. Let’s look at the key ingredients that make these treats so good.
Core Ingredients List
- 1 cup creamy peanut butter
- ¼ cup softened salted butter
- 1 cup powdered sugar
- ¾ cup graham cracker crumbs
- ½ cup crushed Butterfinger candy bars
- 10 ounces chocolate almond bark
- 1 teaspoon vanilla extract
Quality Considerations
Choosing top-notch ingredients is key for great taste and texture. Fresh peanut butter and real butter make a big difference. Pick high-quality chocolate bark or chips for the best coating.
Possible Substitutions
Being flexible is important when making these treats. Here are some good swaps:
- Swap creamy peanut butter with crunchy varieties for extra texture
- Replace milk chocolate with dark or white chocolate
- Use rice krispies instead of graham cracker crumbs
- Substitute margarine for butter in dairy-free versions
- Try alternative nut butters like almond or sunflower seed butter
Keep in mind, each swap can change the taste and texture a bit. Feel free to experiment and find your favorite mix!
Step-by-Step Preparation Process
Making these tasty no-bake desserts is simple. Butterfinger Balls are a straightforward candy recipe. They need little kitchen skill but pack a big flavor punch. Get set to turn a few ingredients into a delicious treat!
- Crush 16 fun-sized Butterfinger candy bars into fine crumbs using a food processor or rolling pin
- Mix the crushed Butterfingers with creamy peanut butter until well combined
- Shape the mixture into uniform 1-inch balls
- Place the formed balls on a parchment-lined baking sheet
- Chill the balls in the freezer for 30 minutes to firm up
To coat the balls, melt 2 cups of semi-sweet chocolate chips with 1 tablespoon of vegetable shortening. Tip: Melt the chocolate in 30-second intervals. This prevents burning and keeps it smooth.
Coating your Butterfinger Balls is easy. Use a dipping tool or fork to dip each ball in the melted chocolate. Remove excess chocolate and set on clean parchment. You’ll get homemade candy that looks like it came from a store!
Chocolate Coating Techniques and Tips
Turning your homemade Butterfinger balls into chocolate-coated treats needs skill and care. The coating makes these snacks look like they came from a bakery. They will wow your loved ones.
Melting Methods for Perfect Chocolate
There are two main ways to melt chocolate for your Butterfinger balls:
- Microwave Method:
- Use a microwave-safe bowl
- Heat chocolate in 30-second intervals
- Stir between each interval to prevent burning
- Double Boiler Technique:
- Create a gentle, indirect heat source
- Prevents chocolate from scorching
- Ensures smooth, consistent melting
Professional Dipping Techniques
To get a smooth chocolate coat, you need practice and the right method. Use a fork to pick up each Butterfinger ball. Gently tap off extra chocolate on the bowl’s edge. This method gives you a thin, even chocolate layer that looks great.
Troubleshooting Coating Challenges
Dealing with common coating problems can be tricky, but there are fixes:
- Chocolate seizing: Add a teaspoon of coconut oil to restore smoothness
- Thick coating: Thin chocolate with a small amount of vegetable oil
- Uneven surface: Tap fork gently to remove excess chocolate
Pro tip: For the best results, use chocolate melting wafers instead of standard chocolate chips. They give a smoother, more consistent coat for your tasty Butterfinger balls.
Creative Decorating Ideas for Special Occasions
Turn your Butterfinger Balls into stunning holiday treats that will impress your guests at any party. These delightful treats can be customized to fit any celebration theme or season.
Get creative with your decoration techniques to make these treats unforgettable. Here are some exciting ways to elevate your Butterfinger Balls:
- Winter Wonderland Theme: Drizzle white chocolate over dark chocolate coating for a snowy effect
- Holiday Festivity: Sprinkle red and green sugar crystals for a Christmas-inspired look
- Shape balls into seasonal forms like trees, stars, or candy canes
- Create a DIY decorating station with various sprinkles and small candies
Kids will have a blast decorating. Set up a fun station with different colored sugars, sprinkles, and edible glitters. Let them turn simple Butterfinger Balls into personalized treats that show off their creativity.
Pro tip: Use themed decorations that match your event. For a birthday party, add colorful sprinkles. For a wedding shower, choose elegant pearl-like sugar crystals. The possibilities are endless!
Storage Guidelines and Shelf Life
Keeping your bite-sized sweets fresh is key. Butterfinger balls are great snacks that last longer with the right storage. Knowing how to store them keeps their taste and texture perfect.
Choosing the right storage method is essential. Different ways can keep your treats fresh for longer, meeting your needs.
Room Temperature Storage
For room temperature storage, follow these steps:
- Use an airtight container
- Place parchment paper between layers
- Keep away from direct sunlight
- Consume within 7 days for best taste
Refrigeration Tips
Refrigeration extends the life of your sweets:
- Store in sealed container
- Place wax paper between layers
- Refrigerate up to 2 weeks
- Let sit at room temperature for 10-15 minutes before serving
Freezing Instructions
Freezing is great for long-term storage:
- Wrap individually in plastic wrap
- Place in freezer-safe container
- Store up to 3 months
- Thaw in refrigerator overnight before serving
By following these tips, you can enjoy your homemade Butterfinger balls for weeks. They’ll stay crisp and flavorful.
Common Issues and Solutions
Making perfect Butterfinger Balls can be tricky. But, most problems have easy fixes. These will help you make these tasty no-bake treats in no time.
When making Butterfinger Balls, texture issues might pop up. Natural peanut butter can separate, making your mix too runny. Here are some tips to fix this:
- Refrigerate the mix for 10-15 minutes before shaping
- Use stabilized peanut butter with less oil
- Add powdered sugar slowly to thicken
- Mix ingredients gently to avoid heat
Temperature is key for your Butterfinger Balls. Warm kitchens can make fats too fluid, while cold environments might solidify ingredients too quickly. Work in a cool space and follow these temperature tips:
- Keep ingredients slightly chilled
- Work in short batches
- Use a light touch when mixing
Chocolate coating can also be a challenge. Use high-quality baking chocolate with at least 60% cocoa. Keep your chocolate melting smooth by working in a consistent temperature. Use a gentle coating technique for a perfect finish.
Variations and Flavor Adaptations
Turn your classic peanut butter balls into fun desserts with these flavor twists. These treats are versatile, letting you try many creative combinations. This will make dessert time exciting for everyone.
Spice up your peanut butter balls with these innovative flavor twists:
- Holiday Mint Crunch: Crush peppermint candies and roll your balls in the minty pieces before chocolate coating
- Nutty Adventure: Coat balls in finely chopped almonds, pecans, or pistachios for extra texture
- Seasonal Spice: Mix in cinnamon, pumpkin pie spice, or nutmeg for warm, comforting flavors
- Tropical Surprise: Sprinkle shredded coconut or add dried fruit chunks to the mixture
For those with dietary restrictions, you can easily modify the recipe. Try using dark chocolate for a richer taste or swap out regular peanut butter for almond or sunflower seed butter. Gluten-free graham cracker crumbs work perfectly as a binding agent for those avoiding wheat.
These kid-friendly desserts are not just treats—they’re canvases for culinary creativity. Experiment with different coatings, mix-ins, and flavor profiles to discover your family’s new favorite peanut butter balls.
Conclusion
Creating Butterfinger Balls is more than a simple recipe. It’s a mix of nostalgia and creativity. These treats turn classic Butterfinger candy into a homemade delight with minimal effort.
Making these candies lets you show off your kitchen skills. You can make them for holidays, parties, or just a sweet treat. Remember, the more you make, the better they get.
Butterfinger Balls are perfect for anyone who loves baking. They’re easy to make and always a hit. Share your creations and try new things. Enjoy the process of making these tasty treats.
We want to hear about your Butterfinger Balls adventures. Share your unique recipes and tips. Your ideas might inspire others to start their own baking journey!
FAQ
What are Butterfinger Balls?
Butterfinger Balls are tasty no-bake treats that taste like Butterfinger candy bars. They’re small, made with crushed Butterfinger, peanut butter, and chocolate. They’re easy to make at home and super delicious.
How long do Butterfinger Balls take to prepare?
Making these treats is quick. It takes about 30 minutes to prepare and another 30 minutes to chill. They’re great for a quick dessert or party snack.
Can I make Butterfinger Balls without Butterfinger candy bars?
Yes! You can make similar treats with other ingredients. Use crushed peanut butter candy or graham cracker crumbs instead of Butterfinger bars.
Are Butterfinger Balls suitable for children to make?
Absolutely! These treats are safe and fun for kids to make. Adults just need to help with the chocolate. Kids can mix, roll, and decorate.
How long can I store Butterfinger Balls?
Store them in an airtight container for up to 1 week at room temperature. They last 2 weeks in the fridge or 3 months in the freezer. Keep them cool and dry.
Can I make Butterfinger Balls gluten-free?
Yes, you can make them gluten-free. Use gluten-free graham crackers or cookies. Make sure all ingredients are gluten-free.
What’s the best way to coat Butterfinger Balls in chocolate?
Use a dipping tool or fork to coat them in melted chocolate. Tap off excess chocolate and place on parchment-lined baking sheet. Let excess chocolate drip off for a clean look.
Can I make variations of this recipe?
Definitely! Try different chocolate coatings, add sprinkles, or drizzle with contrasting chocolate. The recipe is versatile and fun to customize.
Are Butterfinger Balls suitable for holiday gatherings?
These treats are perfect for holiday parties! Customize them with seasonal sprinkles or color-coordinated chocolate. They’re a crowd-pleasing dessert.
What equipment do I need to make Butterfinger Balls?
You’ll need basic tools like a mixing bowl, measuring cups, and a baking sheet. Use parchment paper and a way to melt chocolate. Optional tools include a dipping fork for a professional look.